Today we are talking about basting your quilt. What does this mean? Once you have your quilt top complete, you want to layer it with the batting and backing in such a way that you are able to keep the layers from shifting while you quilt it down. We call this the quilt sandwich.
There are any number of ways to keep your sandwich from shifting. For some smaller pieces, you may not need to do any basting at all – just layer it up and start quilting from the middle out. Early in my quilting, I used to use safety pins. If you do a google search on basting methods, you’ll see quite a few different methods available.
My preference is to use basting spray.
I have a spray that I tend to buy as much as possible whenever it goes on sale, 2-3 times a year. It’s not unusual to see 20 cans on my shelf – I’ll use them all in the course of a year! I make that many quilts. Different people are very loyal to specific brands. I am loyal to my budget.
What you’ll need:
- Top, batting and backing, ready for layering
- A place to lay your quilt out flat – well ventilated!
- Masking tape
- 1-2 cans basting spray (depending on the size of can and size of quilt)
- Scissors
Top, batting and backing – ready for layering
Make sure your quilt top is pressed and completed. Remove as many loose threads as you can while you are ironing.
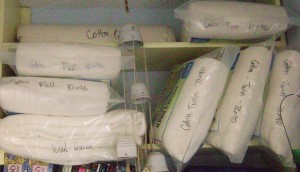
I’m partial to cotton batts. They are a little more expensive than polyester, but they breathe better than poly and I can iron my completed quilt (to remove fold lines). Never iron a quilt with a polyester batt – you’ll melt the batting. There is a “fusible batt” available which is the exception to this, but I found the fusible batt to be more bother than help, so I don’t use it. Depending on what you are accomplishing in your quilt, there are also wool batts, silk batts, and various mixes of cotton/wool/silk/poly.
I have used bamboo batting – I love how soft it is and it’s easy to work with. But I have since learned that the process to make tough bamboo fibers into soft fabric/batting is very eco-UNfriendly. Lots of nasty chemical waste. I don’t use bamboo any more.
Aaaaand the backing. I love the extra-wide fabrics available for backing these days. Although, you can make some pretty cool pieced backings, too. Whatever you choose, have it pressed and ready to lay it out. It doesn’t need to be totally wrinkle free like a dress shirt, but you do want to remove the major creases. Once you’ve basted your sandwich, any creases will be part of your quilt.
A place to lay out your quilt
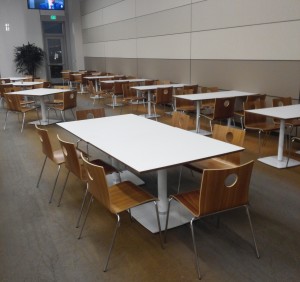
I do not have enough floor space at my home to lay out my quilts, even if I move the furniture around. So I use the cafeteria at my office. They have lots of tables that I can push together for a work space, no one is there after the regular work day, and it’s a huge, airy room with great ventilation.
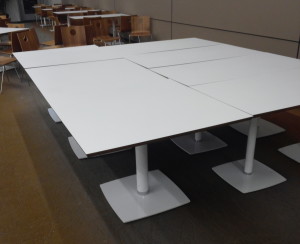
This table is too small.
Today’s blog was inspired by my having two queen sized quilt tops that I needed to baste. After my regular day at the office, I headed down to the cafeteria and pushed together four tables. This is usually enough for my full sized or smaller quilts. But not the queens! You really want to have a space that the entire quilt top can lay flat and smooth. But if I put too many tables together, I can’t reach into the middle of the quilt.
Laying out on the floor?
So, I thought, let’s just lay it out on the floor. I’ll have to be careful when spraying so that I don’t get adhesive spray on the carpet, but this will be fine. Um. No. As I stood there staring at my backing on the floor, I could just feel the inevitable bruises on my knees. Nope – I’ll figure out a way to reach the middle of the quilt after I push together more tables.
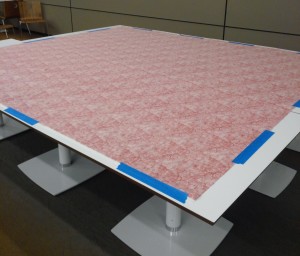
This will work! So the first step is to lay out the backing on the table, wrong side up.

I use blue painter’s masking tape to give a slight stretch to the backing and hold it down.
As a note, different masking tapes have different amounts of sticky on them. The blue tape has a little less sticky, which is why painters use it. It is not likely to leave any residue on your fabric.
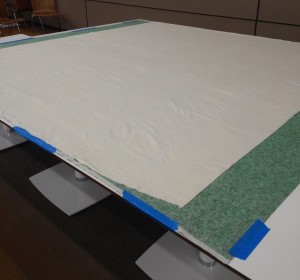
backing wrong side up, batting layered on top
Next unfold your batting on top of the backing. Gently smooth it out, patting it down to eliminate folds. You do not need to iron your batting.
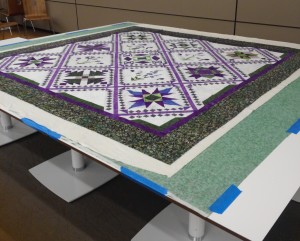
Finally, lay the quilt top, right side up, on top of the batting. You now have a quilt sandwich!
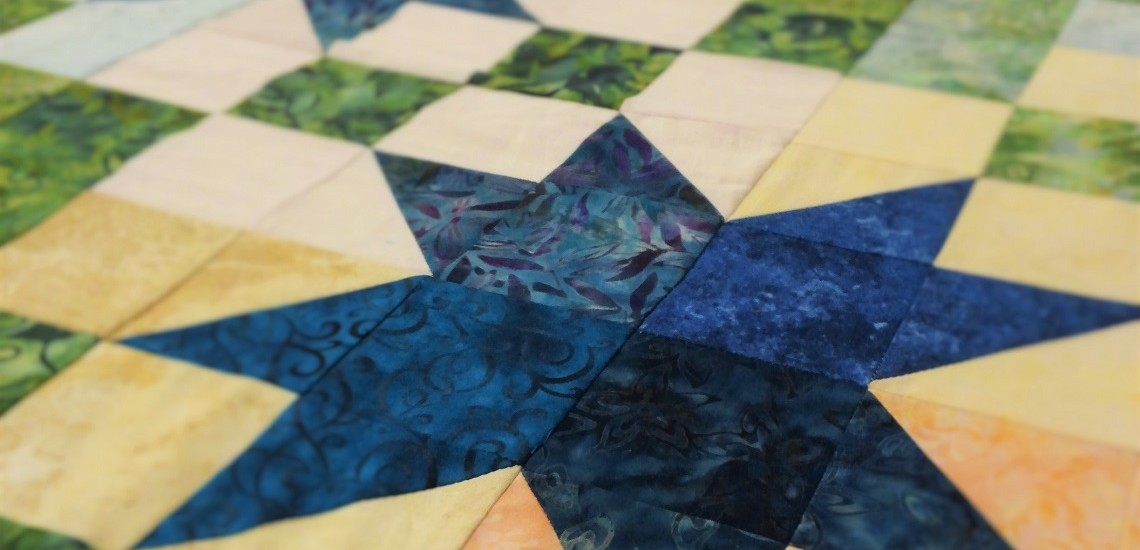
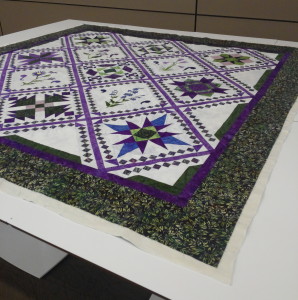
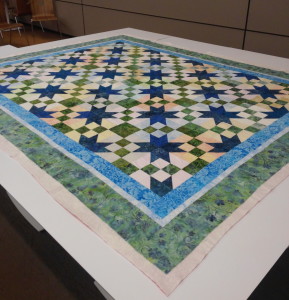
This is about the only time that I am able to look over my quilt top laying flat like this. I’m going to take a moment to consider what quilting design/pattern I want to stitch in. I’m also going to look for any particular faults that will affect my quilting…
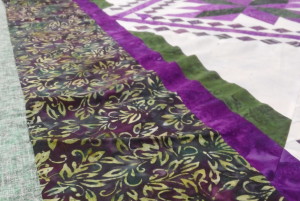
And I can see that I have got some serious wobbles in this border! Now, if this were a competition quilt, I would stop right here, take it home, and re-work the border. But this particular quilt is not being made for competition – it’s a block-of-the-month from a local quilt shop. Since it’s a “kit” quilt, I can’t show it at any national show. This entire quilt is intended as practice to improve my skills. Also, I happen to know that I messed up some of the piecing in the seminole sections of the blocks, so I am making an executive decision to just “quilt out” the border wobbles.
“Don’t let perfection be the enemy of good!”
This is a beautiful quilt. I love the colors and fabric, there is plenty to look at with all the different blocks, and, really, it’s come together very nicely. I will likely be the only person who ever notices that my borders have a wobble or that some points have been cut off. I shall continue on and finish!
Carefully fold back about half the quilt top to expose the batting. Spray your adhesive, following the directions on the can, onto the batting. Then carefully lay the quilt top back down on top of the sticky batt. You may want to spray 1/3 or 1/4 at a time. As you lay the top down, gently smooth it down from the center out. No wrinkles allowed! This is why I was concerned about the table being so deep that I cannot reach the center. For tonight, I used my coat to swat down the center area that I couldn’t reach. When I got to my wobbly borders, I did some gentle pulling and adjusting and smoothing to minimize wrinkles.
One of these days I’m going to invent a gadget that will allow quilters to easily baste a big ol’ turkey of a quilt top, but will fold up and store out of sight.
I’m going to call it,”The Turkey Baster”.
After you have adhered the top to the batting, you’ll repeat the process by folding back the top/batt and spraying the backing. This step goes a little faster since you aren’t adjusting the top any more. Still smooth it down from the center out.
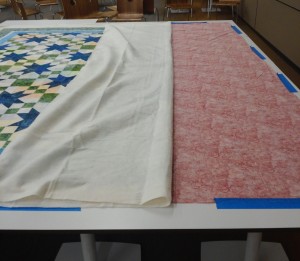
My final step is to trim away the excess batting and backing to within a couple inches of the quilt top. This isn’t necessary, but, hey, I was taking pictures for posterity and thought it looked neater. The wobbles are hardly noticeable now.
On to the second quilt of the night!
Backing taped down.
Layer it up.
This time I got a picture when I was folding it back for spraying.
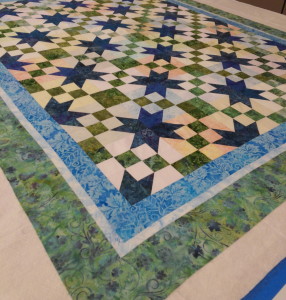
And now I have a trimmed, basted quilt sandwich. This is a very traditional quilt pattern. I am pleased with how it is looking so far. I will likely show this one at the local county fair this coming July.
The last step of basting is to return the cafeteria to its previous state – or better. I generally wash down the tables so that I don’t leave behind any stickiness from the spray.
Always leave a space neat and tidy.
Check back to see these quilts when they are finished! They should be all done within a few weeks.