Please walk with me a moment while I explain where I began before I began making quilts.
I wasn’t always a quilter.
In the late 80’s I was in my early 20’s and I was proud to be a Modern Woman. Yes, I was an 80’s Lady! I didn’t cook and I didn’t sew – I didn’t do any of those old fashioned things that kept women tied down and locked into out-dated roles. I was free!
Or, I thought I was free. In fact, I was enslaved to a different set of roles and expectations, the new rules of society that demanded that I conform to their expectations. And society did not make me happy or fulfilled.
But when God reached down and changed my heart, suddenly I found true freedom! I discovered that when I follow His handbook for living (the Bible) then I am both happy and fulfilled. No, it’s not a set of rules that I must follow or be cast to the outer darkness. It is a relationship with a living God who wants to watch over me and protect me, who wants me to enjoy life. What a thought – God wants me to be happy!
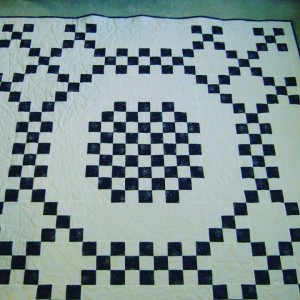
Criss Cross; 2000
My First Quilt
So it happens that in 1992, not long after Jesus changed my life forever, that I woke one morning and decided I wanted to do something I’d never done before: I wanted to make a quilt! I drew out a sketch of the quilt I wanted, then figured out the math of how much fabric yardage was needed. Next I pulled out my Craftsman retractable measuring tape, a marking pen, and a pair of scissors. My first quilt, which I am NOT posting here, was a very simple design I called “X Marks the Spot”.
I had no idea what I was doing. After I’d sewn the top, I put a border on it and then stenciled in a leaf and vine design. Yes, stenciled. It was the 90’s. I didn’t know how to put a backing on the quilt or how to “stuff” it with the batting, so I bought a book (one of Eleanor Burns’ early “Quilt in a Day” books) and finally got it all done – lumpy corners, uneven edges, very little actual quilting. It was beautiful! I felt so much accomplishment in that project as I never had before! I was hooked!
American Ladder; 2009
I have photos of my early quilts, but they aren’t very good photos. Perhaps one day I shall post them anyway.
With every quilt I got more practice. My piecework improved so that corners were matching and I wasn’t cutting the tips off my triangles. I found that if I cut accurately, and sewed accurately, I got really great results! I started buying all the specialty quilting tools to help improve my technical skills.
Most quilts I made were given as wedding gifts and baby gifts. And then I became hooked on a whole new benefit of quilting: seeing a person’s joy and excitement in that moment that they realize they are receiving a quilt! This is one of the best parts of quilting for me!
There are 3 steps to making a quilt:
The Planning * The Making * The Giving
I also wanted to do a little fancier stitching on my quilts. I started drawing designs on the quilts and practicing free-motion quilting. The below “Celtic Wheel” was one of my early free-motion quilts.

Celtic Wheel; 2011
Competition
In 2012, I was chatting with a dear friend who commented that she was thinking about showing some of her photography at the local County Fair that year. This got me thinking about showing a couple of my quilts. I mean, why not? I make pretty quilts – everyone says so. Let’s see if I might bring home a ribbon or two.
I chose two of my recently completed quilts and brought them in. I even took time off work so that I could listen to the judge make her comments.
So here’s how it works: you enter your quilt in a specific category so that quilts can be judged against similar quilts. For example, one category may be “machine pieced, machine quilted, large” and another category may be “hand applique, hand quilted, small”. The judge examines each quilt in a given category, having a scribe write her notes. Many competitions will have list of items being evaluated: technical (corners matching, points sharp, borders even, etc) and artistic (colors well balanced, uniform quilting, overall pleasing appearance). The quilts for each category are stacked on a table so the judge may examine them one by one. She then goes down the list having her scribe underline items that are well done and circling items that need improvement. Within each category, the judge then chooses first (blue), second (red) and third (white) place ribbons. The County Fairs often give a small cash prize for the ribbons ($2 for blue, for example). Major competitions may give larger cash prizes or prize packages (sewing machines, books, fabric, etc).
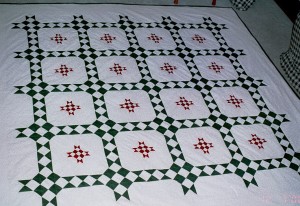
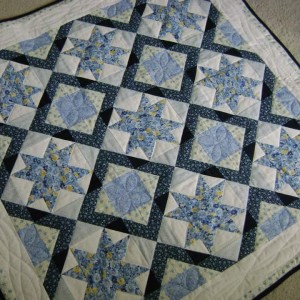
American 9-Patch, 2012
My first judged quilt, pictured above, was in a category with about 15 other quilts. The other quilts were pretty amazing, but my simple design was very pretty in its own right so I was eager to listen and learn. The judge came to my quilt and started issuing comments to her scribe: Circle “corners square”. Circle “straight edges”. Circle “even stitches”. (Remember, “circle” means “needs improvement”!) Circle. Circle. Circle. At this point, I was extremely pleased that we in the audience are required to remain silent so that the judge does not know who made one quilt or another. I was cringing with every new item to be circled. Finally she came to the end and had her helpers hold up the quilt so that she could stand back and look at it from a short distance.
And then the judge said, “Now THAT is a pretty quilt!”
Suddenly I was no longer cringing! I was sitting up – mine is a pretty quilt! In spite of all its faults, it was pleasing to look upon and it would serve its function well. The rest – the ninety degree corners and even borders and all the rest – that was all technical stuff that I could learn and improve upon. I bought the little booklet that listed out the standards that the judges were looking for. Now that I had the standard, I could bring my quilts to the next level!
A Life Lesson
I would like to pause and comment that this lesson I learned in quilting was so profound that I have applied it to all of life. Whenever I start feeling terribly pleased with myself, I stop and ask, to what am I comparing? What is my standard? Why do I consider myself to be a pretty good person? Is that compared to the convict serving time? Or am I “pretty good” compared to Jesus, my ultimate example? There is a standard to which I have not yet attained in life. My God is helping me to improve, but it’s a long, long project!
I ask myself: “What is my standard?”
2012 Baby Quilt – 2nd Place at the County Fair
That first year at the County Fair, the quilt I described above did not win a ribbon. The other quilt I showed won a 2nd place ribbon, but only because I’d entered it in the wrong category and it happened to be marginally better than one of the other quilts in the same category. The following year I won several second and third place ribbons. Last year, 2015, each of the quilts I entered won 1st place in their categories – and I even won a ribbon for having won the most blue ribbons! I’ve also shown a couple quilts in national shows (no ribbons) and one of my quilts won a “best first time entrant” award at the Colorado State Fair in 2014 – Mr. Orange is my nod to the Broncos.
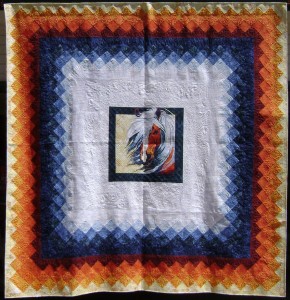
Mr. Orange; 2014
But still improvement is needed – I have not yet won a “Best In Show” at the County Fair, nor have I ribbon’ed at a major competition.
Quilting is an Expensive Habit
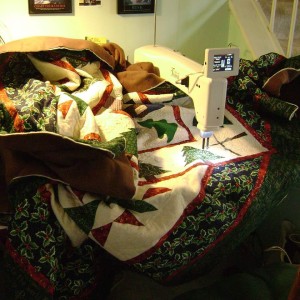
These days I am constantly working on my piecing and quilting skills. I have been blessed to obtain a “mid-arm” quilting machine. This has a good 16″ from needle to motor so I have plenty of space to quilt down the big quilts! Though it has a computer display, it is not digitized – all my quilting is guided by my own hand.
I also tried my hand at carpentry this last year and built myself a proper work table:
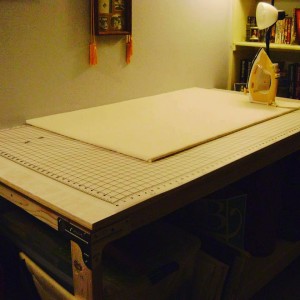
Yeah. I’m not doing that again. But I’m glad I had the experience of making it. And there always seems to be more tools, more rulers, more cutting devices and, of course MORE FABRIC!! I am limited only by my own imagination. And budget.
So I invite you to come along on this journey with me as I seek to improve my quilting skills, and my life skills. Quilting makes me happy – which I know pleases God. And I seek to serve God by serving His people with quilting and cooking and more. What is my standard? There is always more that could be done, if done in love.
Please visit my gallery to view a few of my quilts. I’ll be adding to the gallery periodically. I hope you enjoy!